How to Use Mic With Windows 10 Pro Editing Software
How to Add Voice Over to Video in Windows Movie Maker

Nov 16, 2021• Proven solutions
If you have made a tutorial video, or you want to add an audio explanation to your video, you can simply add it using the Record Narration feature in Windows Movie Maker. This feature allows you to add voice over in Windows Movie Maker quickly and simply.
A Better Way of Adding Voice over to a Video


While adding voice over to video in Windows Movie Maker is simple, Windows Movie Maker has major pit falls. The limited file types and sound editing can make Window Movie Maker a chore to use. A better option for adding a voice-over to a video is Wondershare Filmora's Filmora. Filmora has an exclusive tool for editing audio. You can record the voice over while watching the video, making it easier to edit the audio later. Filmora also has an audio mixer and equalizer that you can use to better edit all of the video's audio at the same time. With Filmora, you have full control of your voice over, the video, and any other audio that is in the video.

Watch the video below to check more detailed information about Filmora.
Learn more details about How to Add Voiceover to Videos
How to Add Voice Over in Windows Movie Maker
To add voice over in Window Movie Maker is an easy process. Here is how to add voice over in Windows Movie Maker.
1. Make Sure That Your Microphone Is Plugged Into the Microphone Jack
Depending on your computer and microphone, you will need to find the microphone jack. Most modern microphones use a UBS connecter or the same jack as headphones. You should check that you are using the right jack if your computer has both a headphone and microphone jack before you try to record.
2. Open Windows Movie Maker, and Import the Video Clips

You do this like you would with any other video that you have made with Windows Movie Maker. Simply click on the Import Video and Audio clips, and select the clips you want.
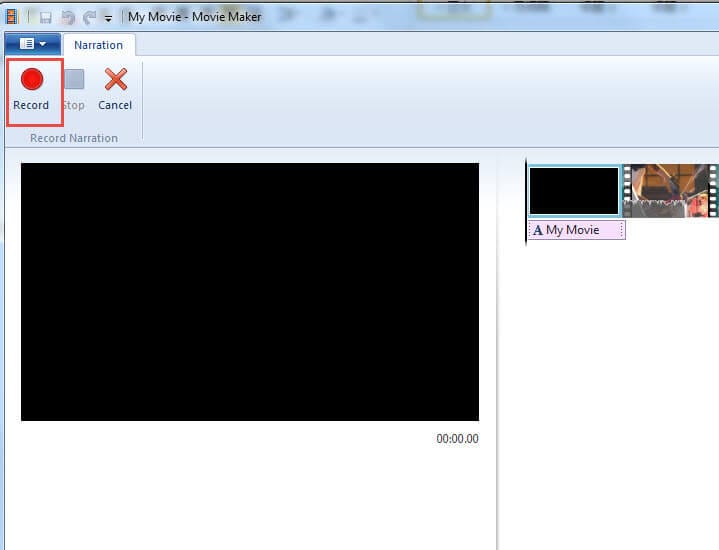
3. Record Narration
This can be found in the top tool bar. When you click on the icon, it will open a new window.

4. Start the Recording
In the Narration window, there are three options. When you click on the record button in the tool bar, the recording will immediately begin. Once you have started the recording, start speaking into your microphone.
5. Adjusting Where You Want To Record
You can easily adjust where the recording starts in your video by dragging the vertical marker to the start time.
6. Stop the Recording
Once you have finished the recording click on the stop button in the tool bar. The narration is saved to your computer, and you can leave the narration window. Once back on the editing window, you will see that your narration is in the video.
7. Position the Narration in the Video
Simply drag and drop the narration in the time line of the video and save the project.

You can also find more detailed information aobut how to add voiceover in Windows Movie Maker in the tutorial below:
Related: How to Add Watermark to Videos in Windows Movie Maker
How to Add Subtitles to Videos in Windows Movie Maker
Liza Brown
Liza Brown is a writer and a lover of all things video.
Follow @Liza Brown
How to Use Mic With Windows 10 Pro Editing Software
Source: https://filmora.wondershare.com/windows-movie-maker/add-voice-over-in-windows-movie-maker.html
0 Response to "How to Use Mic With Windows 10 Pro Editing Software"
Post a Comment